This tutorial is for lubuntu but must work with other banana pi os ...
If your Banana Pi is just out of the box, you will need to install Lubuntu os on your SDcard. Follow this tutorial to do it : http://www.lemaker.org/resources/9-39/banana_pi_quick_start_guide.html
Once it's done, use the password bananapi to log in the user bananapi .
Let's go !
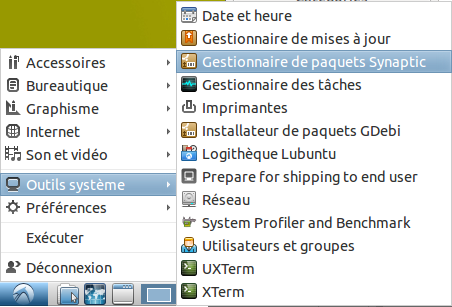
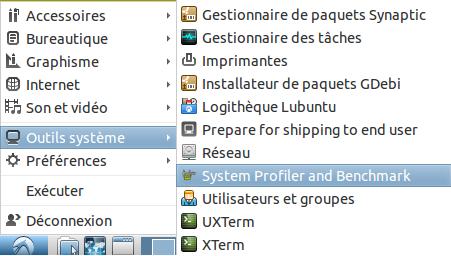
run the program start menu -> system tools -> synaptic package
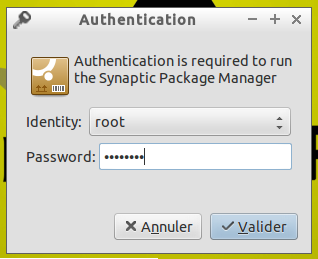
Enter your password (bananapi)
Mine is in french but i'm sure the screenshot will help you ![]()
Clic on search and look for "x11vnc", right clic on it and select it for download .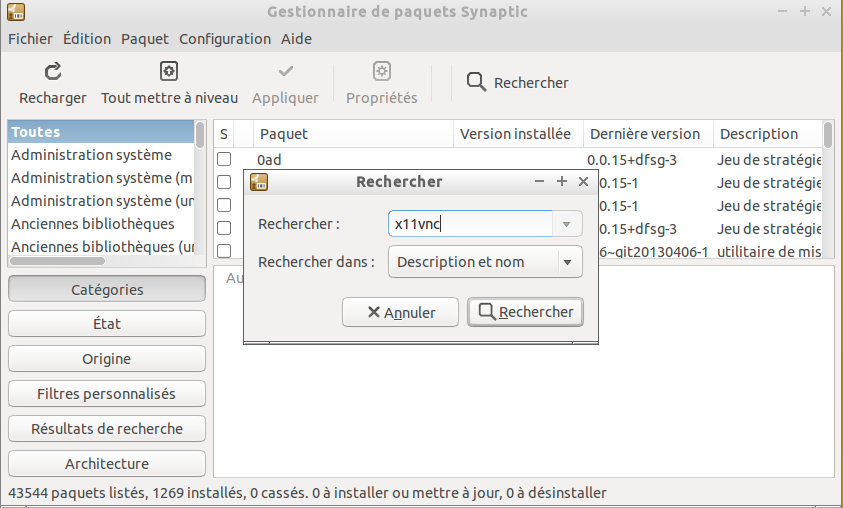
Do the same for the packages "openjdk-7", "gawk",and if you want to change the system language "language-selector-gnome" ( this will be in Start menu -> Preferences -> Language Support )
Clic in the top menu, on "apply", and wait ... drink a coffee ..
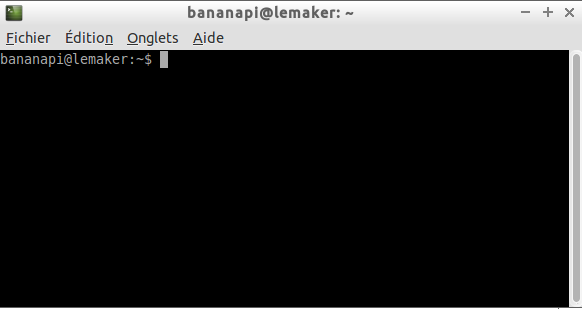
The tools are here, let's meet the terminal ! Go to the start menu -> Accessories -> LXterminal ( What ? .. Oh, yes, you can close the synaptic windows ![]() )
)

The terminal use just text, but don't be affraid, just follow me ![]()
We need to use the command "sudo", but the user "bananapi" (you) isn't is the sudoers file . So we will temporarily be a root user ... enter this command :
su
and type your password (bananapi) you see nothing when enter it, it's normal .
now do this :
sudo leafpad /etc/sudoers
The text editor should open, go to the bottom and add this line
bananapi ALL=(ALL) ALL
.png)
Save and close the text editor . Now we can use the command sudo with the user banana ![]()
We will create a script for make the vnc serveur start itself before the loging screen . This script isn't made by me . The author is "emri" . Why re-invent the wheel , let's use his script !
Go back to the LXterminal window . Enter this command:
sudo touch /etc/init.d/x11vnc
and
sudo leafpad /etc/init.d/x11vnc
Once again, the text editor sould pop up with an emply document . Copy this script, paste it in the text editor, and save it .
#!/bin/sh
### BEGIN INIT INFO
# Provides: x11vnc-server
# Required-Start: networking
# Required-Stop:
# Default-Start: S
# Default-Stop: 0 6
# Description: Manage X11VNC server
### END INIT INFO

## Script de démarrage de serveur VNC avant la fenêtre de connexion
## basé sur le serveur VNC x11vnc et le gestionnaire de fenêtre GDM
##
## emri.e9 [ AT ] gmail.com

## Limitation: lorsque plusieurs instances du serveur VNC sont lancées
## l'option stop les termine toutes, il n'est pas possible de choisir
## une instance en fonction du port écouté

## OPTIONS ############

## Utilisateur principal
## /!\ Ne correspond pas à l'utilisateur avec lequel est lancé le serveur !
## Correspond à l'utilisateur avec lequel vous allez vous loguez sur le
## serveur.
## Limitation: le verrouillage de la session lors de la déconnexion du client
##             VNC fonctionnera uniquement pour cet utilisateur.
## Je n'ai pas trouvé comment récupérer dynamiquement ceci pour l'adapter à
## la session en cours, si vous avez une solution, maillez moi ;)
USER=emri

## Fichier de log
LOGFILE=/var/log/x11vnc.log

## Permet de démarrer plusieurs instances si le serveur est déjà en train de
## fonctionner
ALLOW_MULTI_INSTANCES=false

## Port par défaut (sert aussi numéro de base pour avoir plusieurs instances)
## lorsque l'option ALLOW_MULTI_INSTANCES à true
DEFAULT_PORT=5900

## Autres options de x11vnc
## Pour la liste complète et détaillée des options (anglais)
## cf http://www.karlrunge.com/x11vnc/x11vnc_opts.html
EXTRA_OPTIONS="\
-shared \
-verbose \
-o $LOGFILE \
-forever \
-xkb"

## Commande de vérouillage de session lors de la deconnexion du client VNC
## L'utilisateur lançant le serveur x11vnc étant le root, le verrouillage de l'écran
## n'impose pas la saisie du mot de passe à nouveau, voici la raison du sudo -u.
## Si l'utilisateur spécifié dans USER n'est pas celui connecté, cette commande
## ne fonctionnera pas et l'écran ne sera pas verrouillé.
GONE_COMMAND="sudo -u $USER gnome-screensaver-command --lock"

## FIN DES OPTIONS ############


. /lib/lsb/init-functions

COMMAND=$1

## Gère le port envoyé via la ligne de commande (prioritaire sur DEFAULT_PORT)
if [ -z $2 ]; then
  PORT=$DEFAULT_PORT
else
  PORT=$2
fi

pid=

get_pid() {
  pid=`pidof x11vnc` || false
}

is_running() {
  get_pid
  if [ "X$pid" != "X" ] ; then
    return 0
  else
    return 1
  fi
}

start() {
  ## Ligne de commande principale pour le démarrage du serveur
  ## Pour ajouter des options, il est préférable de modifier les EXTRA_OPTIONS
  ## plutot que cette ligne de commande
  return `x11vnc -bg -autoport $1 ${EXTRA_OPTIONS} -gone "${GONE_COMMAND}" -nopw -safer -auth guess -display :0 | gawk -F PORT= '{print $2}' `
}

X11VNC_stop() {
  log_daemon_msg "[X11VNC] Stopping server..."

  if is_running ; then
    kill $pid
    ret=0
  else
    log_warning_msg "[X11VNC] Server not running"
    ret=1
  fi
  log_end_msg $ret
  return $ret
}


X11VNC_start() {
    log_daemon_msg "[X11VNC] Starting server listening on port ${PORT}..."
    if is_running && ! $ALLOW_MULTI_INSTANCES; then
        log_failure_msg "[X11VNC] Server already running. Operation aborted !"
        log_end_msg 1
        exit
    fi
    start $PORT
    real_port=$?
    if [ -z $real_port ] || [ $real_port -lt $PORT ]; then
      log_failure_msg "[X11VNC] Error(s) occured, consult log file for more informations"
      log_failure_msg "[X11VNC] ${LOGFILE}"
      log_end_msg 1
    else
      log_daemon_msg "[X11VNC] Server started on port $real_port"
      log_end_msg 0
    fi
}


case "$1" in
  start)
    X11VNC_start
    ;;
  stop)
    X11VNC_stop
    ;;
  restart)
    X11VNC_stop
    X11VNC_start
    ;;
  *)
      log_failure_msg "Incorrect syntax: argument missing or incorrect"
      log_success_msg "Usage: $0 {start [port]|stop|restart [port]}"
    exit 1
esac
Now we have to make the script executable and of course test all that, we don't want to re install all the SDcard because the system block at start !
Still in the LXterminal window, use this command for make the script executable :
sudo chmod 755 /etc/init.d/x11vnc
and these for test it :
sudo /etc/init.d/x11vnc start
sudo /etc/init.d/x11vnc restart
sudo /etc/init.d/x11vnc stop
Of course for test it, the server must be started so test on your computer before enter the command "stop " !
How to test it ? You must install on your other computer ( the client ) a software for view vnc display. Personally i've choose realVNCviewer : http://www.commentcamarche.net/download/start/telecharger-34055515-real…
For connect your vnc client will need to know where is the server . Go back to your lubuntu desktop and choose :
option 1 : In the LXterminal window, enter the command " ifconfig" and the ip adress will be displayed on the line "inet adr " for the eth0 :
.png)
or
option 2 :
Go to the start menu -> system tools -> system profiler and benchmark . In " interfaces section "
.png)
Go back again in real vnc and give it this information and the port 5900 so for me it 192.168.1.26:5900
.png)
All is ok ? Cool ! Let's add our script to start :
Again the LXterminal of Lubuntu ( the last time if all go well ![]() )
)
sudo update-rc.d x11vnc defaults
Now you just need to restart your banana pi and you will be able to connect to your session from any computer connected to your local network .
If you need to connect from everywhere in the world, you will need to redirect the port 5900 in your internet box ...
I hope there is no mistake in this tutorial and you success to install your vnc server .
Wow BeetleJuice ! Absolutely,
Wow BeetleJuice !
Absolutely, excellent documentation ! Clear, concise, and thorough !
A big THANK YOU ! o/
I will be referring to this page in the future, not only as a banana pi / vnc guide, but also as an example and guide of excellent documentation.
\o/
use passwords and uninstallation
Hello, thanks for the tutorial.
I have two questions, one is how can I force the server to use passwords with that script and if later on I want to uninstall this is enough to remove the script (delete file)?
I saw in the script the main command line has "-nopw" and I thought that simply changing it to -usepw will work but the VNC server does not start after that.
Thanks.