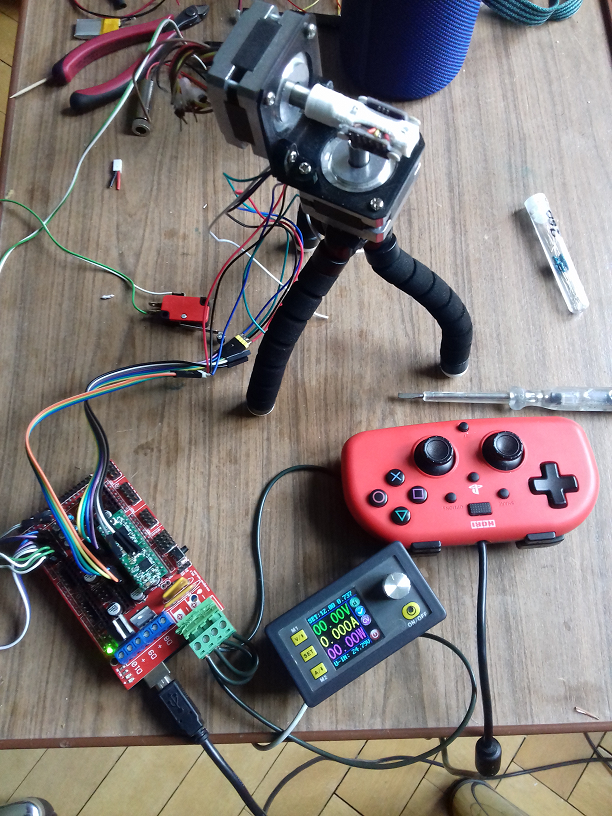
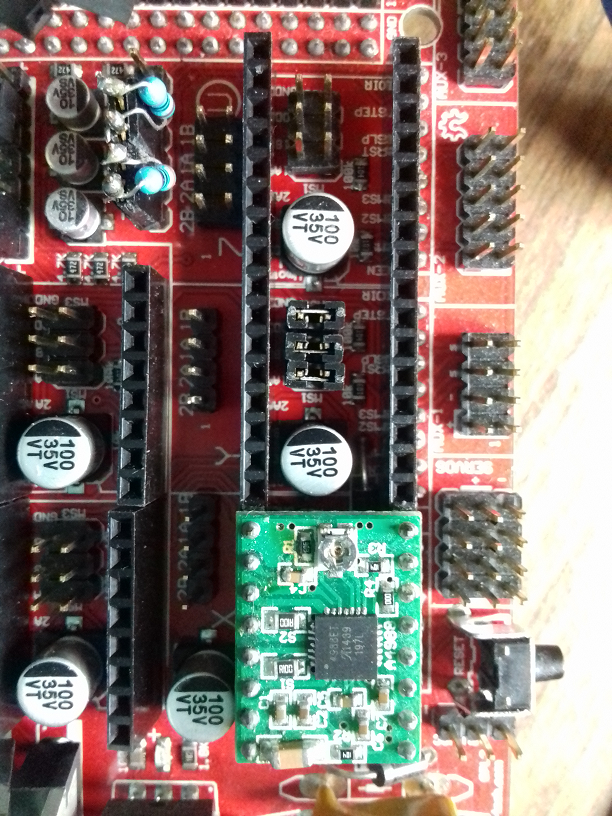
The easiest/quickest way to control Stepper Motors is by using generic 3D printer boards/shields.
These circa £6.00p boards can control up to 5 Stepper motors + 3 FET power outputs.
This Shield simply piggybacks onto an Arduino Mega.
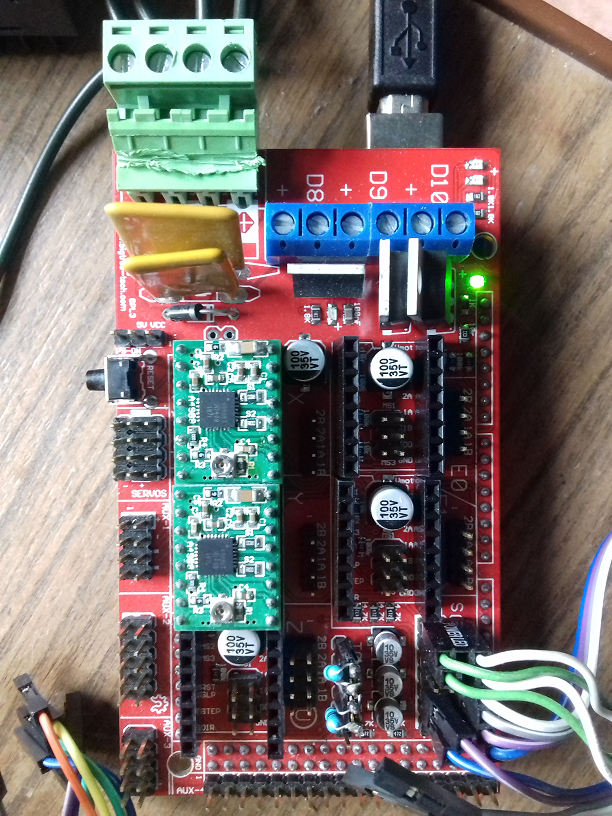
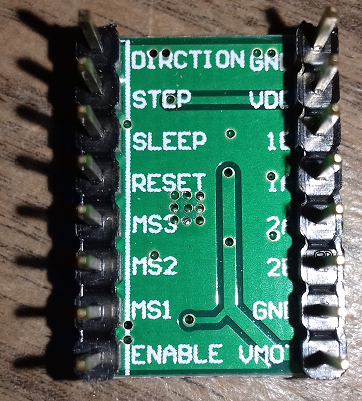
Each stepper requires an A4988 (circa £1.00p/module)
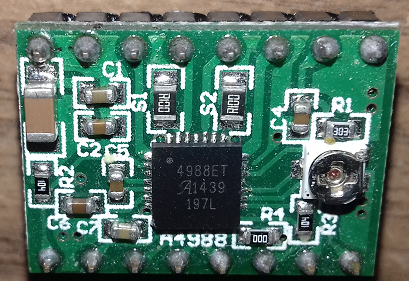
The A4988 is a micro stepping driver for controlling bipolar stepper motors.
You can control the stepper motor with just 2 pins from a controller.
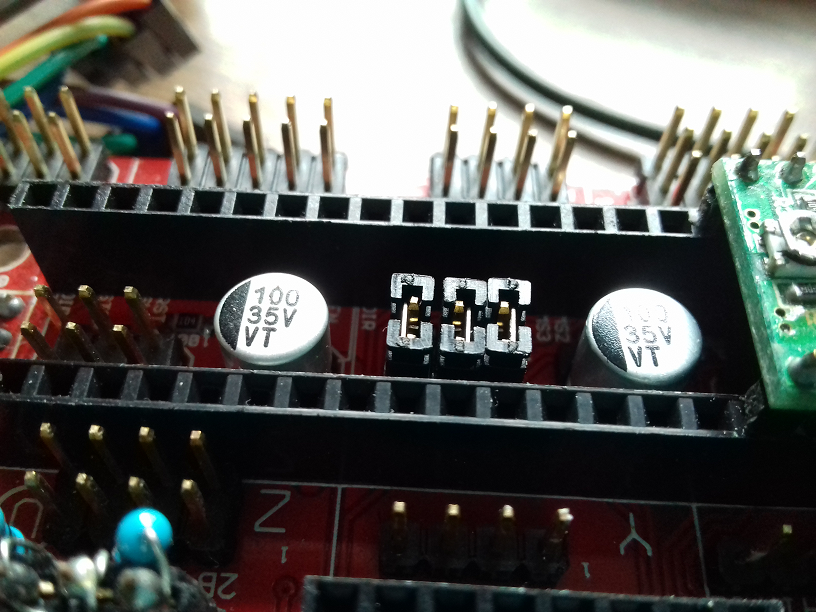
The step increment of the Stepper is set by placing shorting links, in the case below you see 3 links enabling the Stepper to Step in 16th increments.
Please also note the two added 150 ohm resistors (top left), these simulate two temperatures (hot end and hot bed). These are required as they allow the Software to bypass the Temperature failure routines.
Without jumpers the step increment defaults to single stepping.
MRL integration :-
In a nut Shell , To control the Steppers >>>Send them G-Code via a serial link.
Its best to program the Mega/Shield with Marlin https://marlinfw.org/ (this is the control software for receiving Serial G-code instructions and routing the signals to the steppers etc).
There are 2 things to setup in the Marlin configuration.h tab to get you up and running.
either :- #define BAUDRATE 115200 (works ok if you are using the Webgui)
or :- #define BAUDRATE 57600 (seems to be the default of Generic MRL Gui)
Depending on what shield you have it has to be set up accordingly, the generic board above is a Ramps style.
// 33 = RAMPS 1.3 / 1.4 (Power outputs: Extruder, Fan, Bed)
#ifndef MOTHERBOARD
#define MOTHERBOARD 33
#endif
Save and upload Sketch to the Mega.......
From then on the system is live.
As a quick test this G-Code command will move the X axis Stepper 12 Steps :-
G0 X12 ; move 12 Steps (absolute) on the X axis
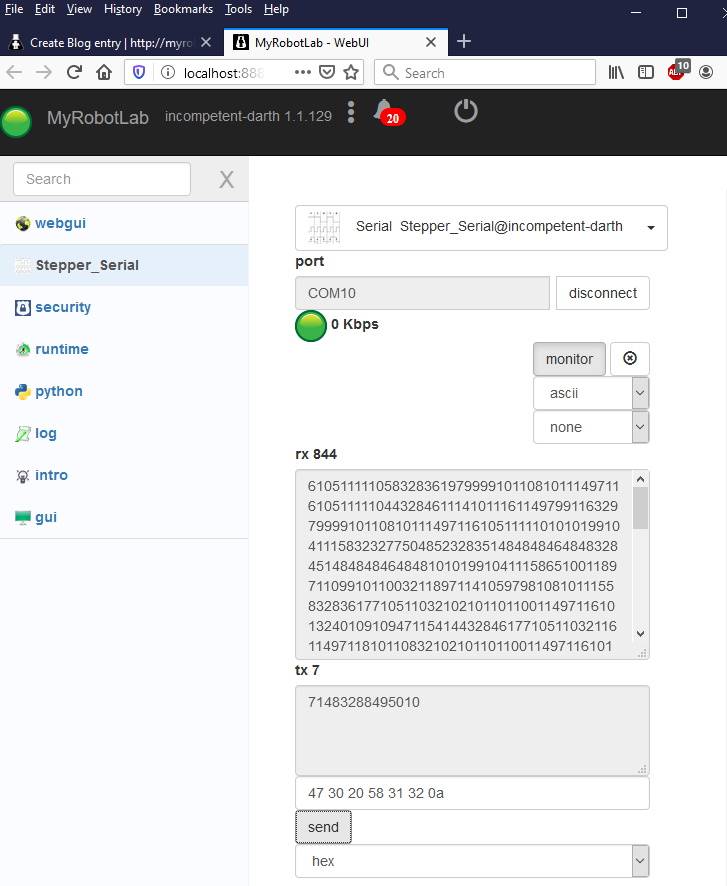
To send this using the WebGui serial monitor it has to be converted to Hex :-
47 30 20 58 31 32 0a
the 0a at the end (LF linefeed) is all that is nessesary to terminate the command.
Paste this into the Serial "send" box and provided you have specified "hex" protocol in the dropdown list the G-Code command will be executed and the Stepper will fire into action.
This is just an intro into Stepper control via MRL, ultimately the G-Code commands can be sent via a Python sketch within MRL.
The gif graphic at the start of this writeup is an example of how this can be achieved using a "PS4" controller to control the Steppers.
keeping the ship steady
wow. awesome! I didn't even think to test to make sure I didn't break this stuff in MRL. I will make sure to validate the webgui to send serial data before merging better acks2.
that being said.. wow! so cool to be sending g-code from MRL! I wonder, perhaps mrl should just generically support a marlin based arduino that can run g-code? hmm... squirrel!
Scratching the surface of G-Code
I have only scratched the surface with the G-Code commands.
These type boards already have 3 limit switches so you can also "Home" the steppers.
Also speed/acceleration & PID control, kinematics.
Auto level control. LED backlighting.
Interesting one is SD card access and ability to add LCD/LED displays with control buttons.
....not to mention with Wifi access.
With regards to serial buffers and Python Stop command
At momo I am more inclined too suspect the Python "Stop" process. i.e. when you try to stop a process via the Gui button it carries on running.
Which means that when I "Stop" and then alter the Python script and re-run .....two version of the Python script are running in parallel, which is why the serial service buffer is having a hard time..... just a guess.
The symptoms are basically unresponsive Gui windows, or long waits until the Gui window releases so you can save or alter the Python script.
My workaround is to reboot MRL each time to test code....then it works fine.