Services
.png)
 DEPRECATED - PLEASE REFER TO http://myrobotlab.org/service/arduino for more information regarding the Arduino services
DEPRECATED - PLEASE REFER TO http://myrobotlab.org/service/arduino for more information regarding the Arduino services
This tutorial should show you the steps necessary to control a servo with an Arduino or Arduino clone micro-controller with MyRobotLab.
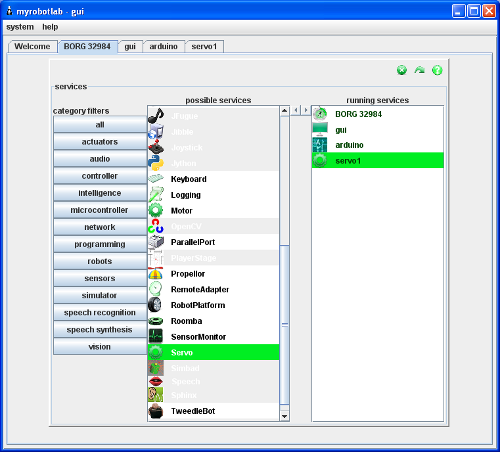
Connect the Arduino to a computer which will be running MyRobotLab. Load the ArduinoSerialBare.PDE on the Arduino through the Arduino IDE. Start MyRobotLab. Load an Arduino service with an appropriate name. In this case I chose "arduino" (creative no?).
Load a Servo service. I named it "servo1".
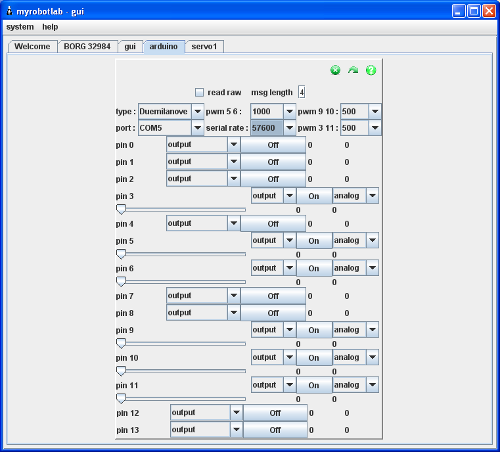
After installing the ArduinoSerialBare.PDE on the Arduino, you will need to configure the Arduino service to correctly communicate with the Arduino over the correct USB/serial port. The configuration can be done programmatically through Jython, or through the GUI as seen below. In this case the Arduino is connected on a Windows machine, COM5. The ArduinoSerialBare.PDE is defaulted to 57600 baud.
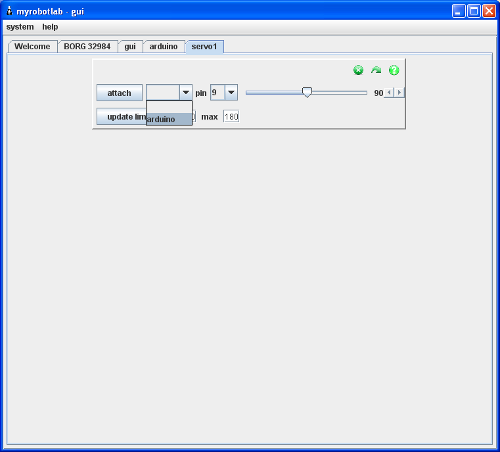
Now I have switched over to the Servo service "servo1" and will connect it to the Arduino service, named "arduino". My servo is connected on pin 9 so I set this on the pin drop down. When the appropriate values are set, press the "attach" button. The servo should respond to changes from the slider. It has been my experience the servo will stop responding if the slider is moved too quickly. I think this has to do with hardware details and your experience may differ. All settings and configuration can be done programmatically with Jython instead of using the GUI.
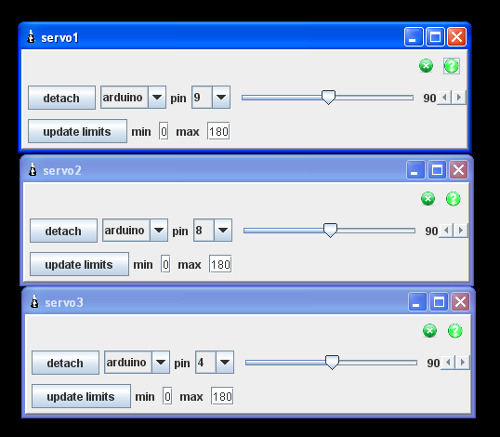
I have loaded 2 other servos and for convienence I have undock the servo GUI's from the MyRobotLab application. This is convienent when you want to change values of the servos without flipping tabs. The undocked gui's can be positioned anywhere on the screen. The green arrow is used to undock, and closing the window (red X) will re-dock the gui into the application. The green X is used to shutdown the service and typically you don't want to do this.
Below is servo.py, which creates and starts an Arduino and Servo service. Then moves the servo back and forth several times. I added a second servo but found it overpowered my Arduino board which was just running on USB power.
from org.myrobotlab.service import Arduino from org.myrobotlab.service import Servo from org.myrobotlab.service import Runtime from time import sleep # create the services arduino = Runtime.create("arduino","Arduino") arduino.startService() servo01 = Runtime.create("servo01","Servo") servo01.startService() # initialize arduino arduino.setPort("/dev/ttyUSB0") arduino.setSerialPortParams(115200, 8, 1, 0) # attach servo servo01.attach("arduino", 9) #servo02 = Runtime.create("servo02","Servo") #servo02.startService() # fast sweep servo01.moveTo(179) sleep(0.5) #servo02.moveTo(179) #sleep(0.5) servo01.moveTo(10) sleep(0.5) #servo02.moveTo(10) #sleep(0.5) servo01.moveTo(179) sleep(0.5) #servo02.moveTo(179) #sleep(0.5) servo01.moveTo(10) sleep(0.5) #servo02.moveTo(10) #sleep(0.5) servo01.moveTo(179) sleep(0.5) #servo02.moveTo(179) #sleep(0.5) servo01.moveTo(10) sleep(0.5) #servo02.moveTo(10) #sleep(0.5) # slow sweep #for x in range(10,170): # servo01.moveTo(x) # sleep(0.05)