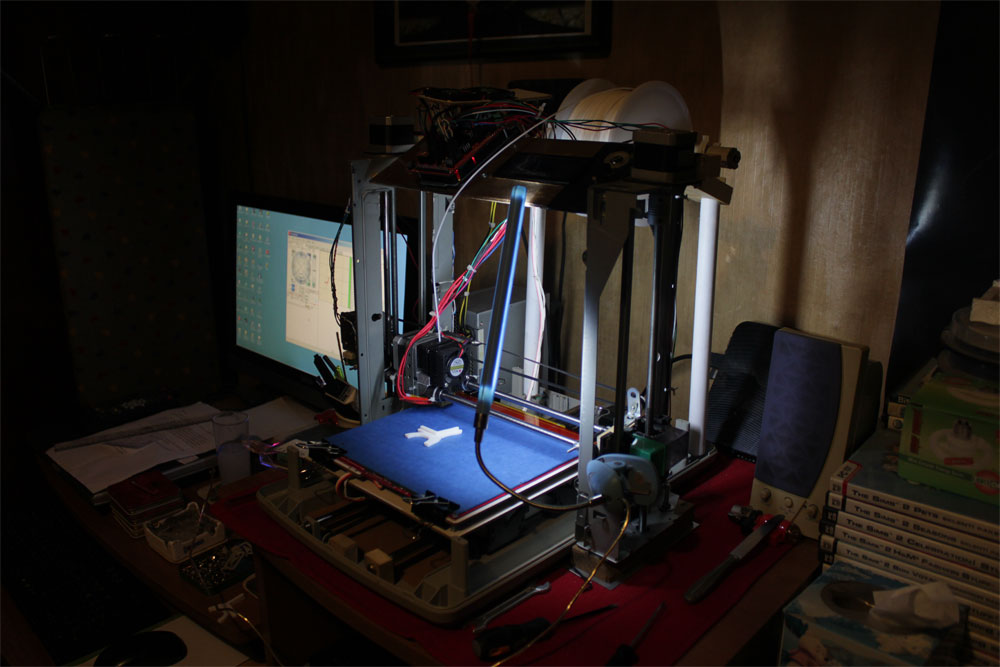
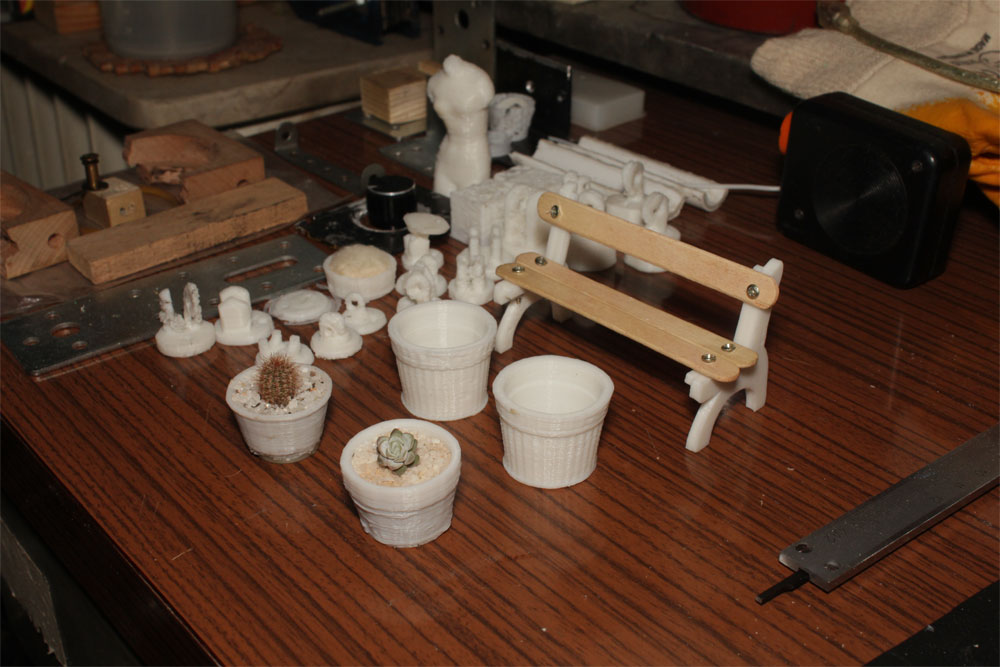
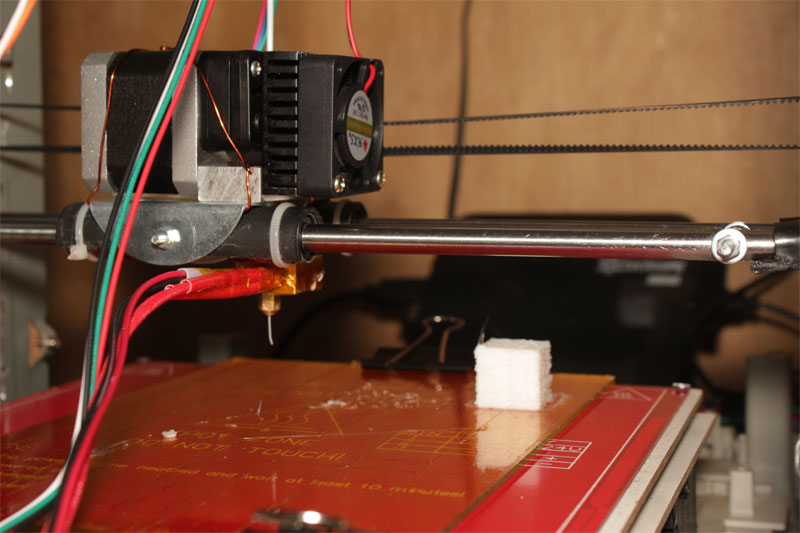
May 2014 update: Nowadays I perfected the printer settings and upgraded to latest Marlin firmware. I also began to use blue painter's tape which helps in sticking of the first layer better. I added a USB led light for night printing. While test printing I happened to own many miniature garden ornaments...
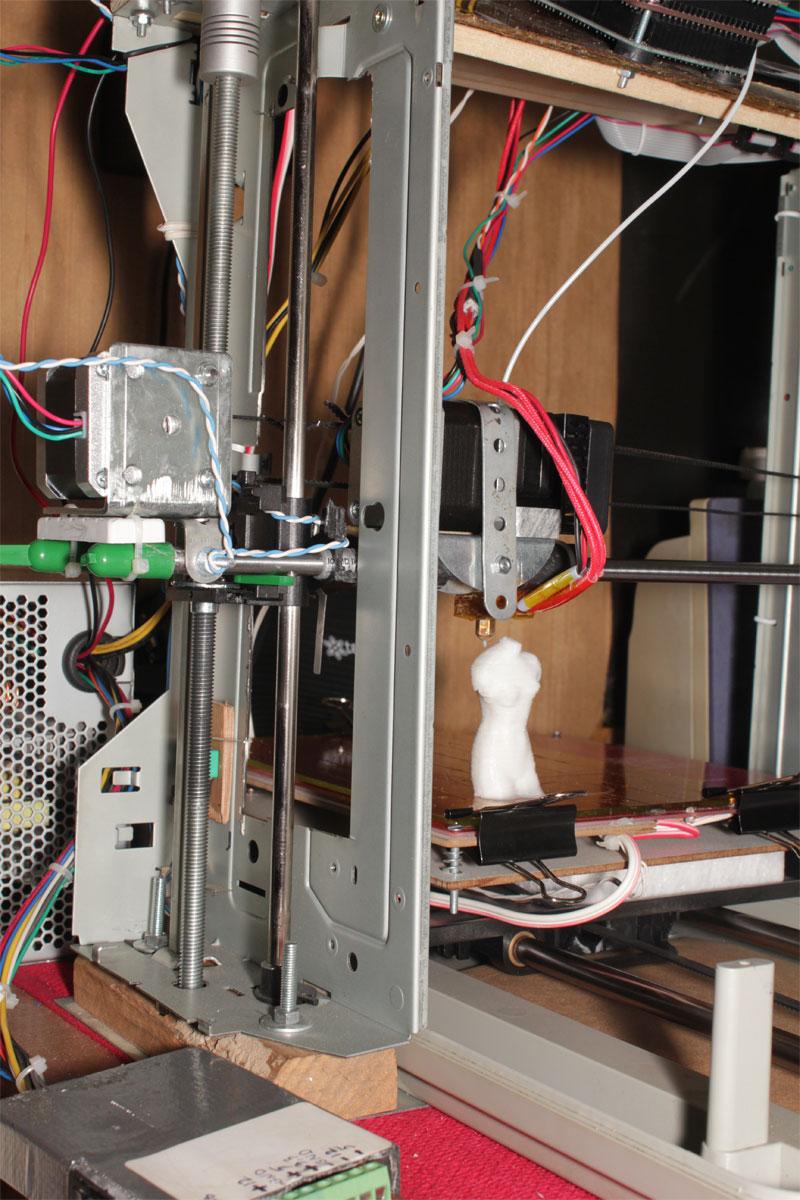
After tweaking with the settings I managed to learn basics of 3d printing... Tidying up the cableware made my printer look more like one...Time for more sophisticated prints... Like Milo Venus sculpture...
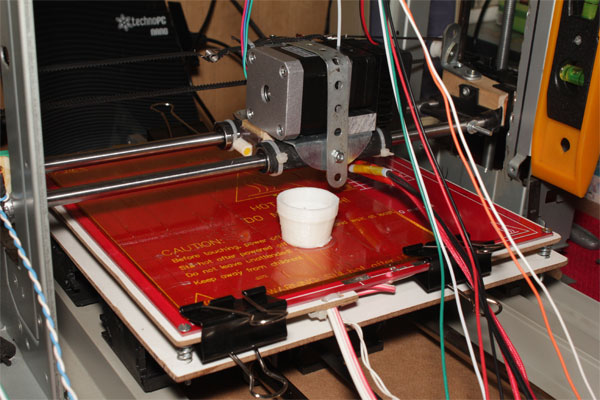
At last some usable prints... loose extruder head was creating wobble on prints... Tightening with rigid metal rails proved good.. And adding 2 tensioner springs to x-belt contributed to more decent prints... Result is a mini pot for my miniature bonsai garden... :) Worky... YAY...
My first print doesn't look good... I am sure this printer can do better... :)
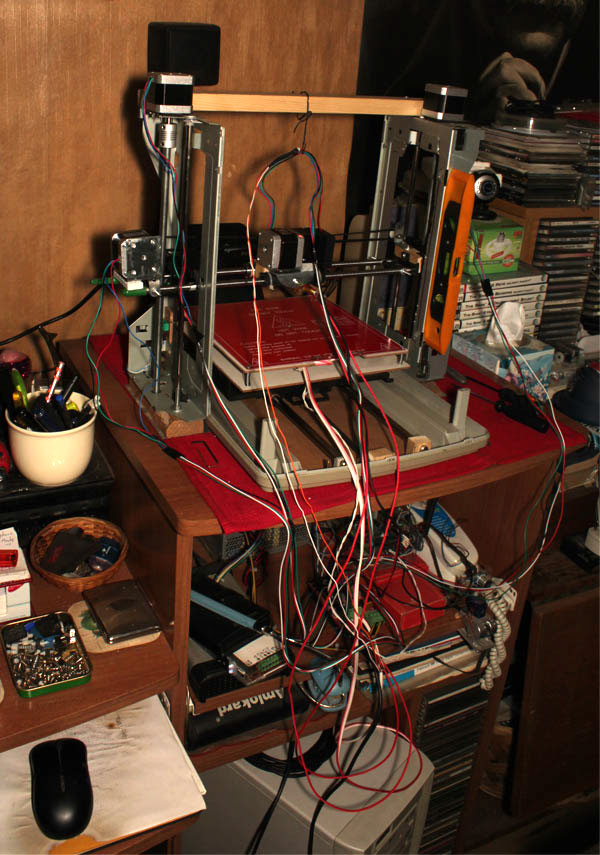
Update on April 2014: At last all necessarry parts of my printer has arrived and I managed to design X-axis and extruder carriage. I decided to make a temporary carriage because this is a RepRap in the end and it can print its own parts once I can get it working somehow. Later I will design and print the extruder carriage according to my needs... Now the printer is a mess of cables and ready for test printing... I callibrated all axes and made test runs without filament... All goes fine by now...
Update on Feb 2014: I began keeping a build log of my 3d printer construction at my site :
http://dh-sims-site.com/repstrap_3Dprinter.html
After the electronics I sourced many hardware bits from here and there and the machine began to build up...

Today I received my goodies which I ordered from AliExpress a while ago... I didnot expected them to arrive till midst January but it just came up today just like Xmas gifts... So happy to unpack them and can't wait to get them assembled as a beginning of my Prusa... Just wanted to share with you...
Looks like a good start
Looks like a good start borsachi
What Prusa version are you going to make I2 or I3 ?
prusa version...
well, I haven't decided yet... my firstr intention is to construct a I2 for simplicity and compatibility with many DIY users... but in the end I may end up with a I3 or totally new design during the build progress.... :)
More Toys ! That is
More Toys !
That is exciting... I'd say its looking more like an I3 vs a I2
custom repstrap...
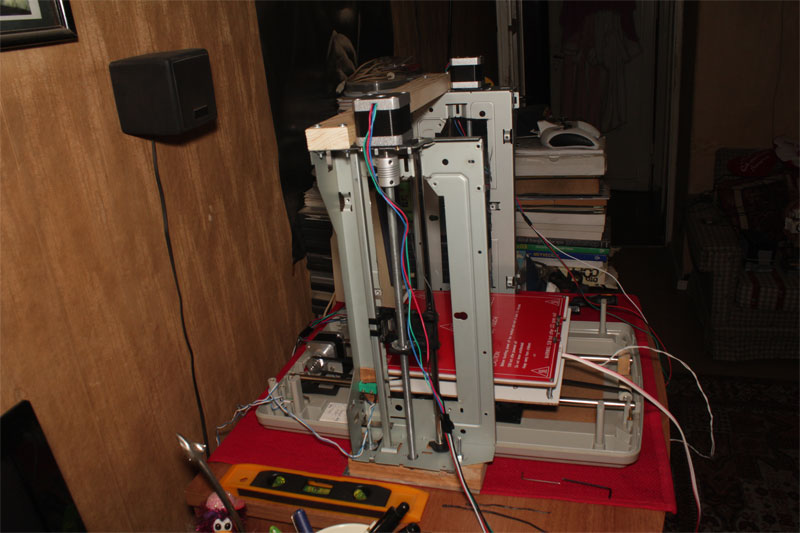
well this is a custom made repstrap... more looking like a I3 with its straight z-axes but I designed it to be inside a contained cabin, thats why it has a more rectangular design rather than triangular... also the all metal chassis proved to be very sturdy, I used vibration dampening rubber pads in all possible joints... all standard software works great up till now with small tweaking in the config.h file... rods are std M8 so they just calibrated well with std steps/mm but I used 28tooth pulleys and GT2 belts on X&Y axes which needed some math to calculate exact steps/mm... the build volume is std 20x20x20cm... I am waiting for the extruder to arrive to test x-axis...
Wow...very nice borsaci... I
Wow...very nice borsaci... I would like to know how much did it cost for you? Frame looks pretty roboust... Can t wait to see it print!!!
My reprap...
Thx Aless,
As you can see most of the frame parts are recycled scanner and inkjet printer parts... All metal and robust... It doesn't even vibrate while working, fast and silent... Details are on my site:
http://dh-sims-site.com/repstrap_3Dprinter.html
Up till now I spent less than $200 on ordered parts, some of them I didnt even had to use... I will start doing some test prints today...
you have better pulleys and
you have better pulleys and belts than me..!!! i see GTK2 there :) no backslash :) !!!
My RepRap...
yes Aless, I found them to be the best... 28teeth aluminum pulleys and GTK2 belts. No backslash and fast.. Also 28teeth makes better resolution... A little math was needed to calculate the steps/mm... But I have problems with extruder now... having a hard time trying to calculate steps/mm... The extruder is a geared compact direct drive type and I cannot get it to work properly... It extrudes well manually but it doesnt while printing... still trying to figure out... any ideas?
no extruding make me think to
no extruding make me think to too low temp or too little pressure on the filament... i had problem with PLA because of too little pressure... the bolt had not the right grip on the filament to push it down.. low temp is not good too, because you need more pressure...
First time
I've seen a completely custom printer from scanner parts. I tried this six years ago and failed miserably. Your ingenuity is astounding sir.
wouaaa i so exiting for you
wouaaa i so exiting for you next ime it is me i print my first piece
WOW ! Looks great Borsaci !
WOW !
Looks great Borsaci ! nice little bosai pot. Your printer looks very solid, I am impressed with your design, and like it very much you are re-using parts from no longer functioning machines.
Well done.
Great Print Borsaci !
Great Print Borsaci !
Hope it gives you the joy
Hope it gives you the joy that we all have! Looks great and i am really pleased for you!
hope to see some new inmoov parts soon!
and when in need of help, just ask, learned a lot about 3d printers, and thankfully the reprap forums is a great help!
gr. Wilco
Very nice borsaci...are you
Very nice borsaci...are you printing in abs or pla?? I use blue tape for pla and it sticks great!! Looking forward to see your InMoov parts :p
MyPrinter...
Aless... I am printing PLA... because it is more manageable. Less heat... No fumes... biodegredable material... Only problem is you cannot do finishing on the surface like you do with acetone and ABS...